HP printers have long been known for their reliability and quality output. However, encountering an issue where your hp printer black ink not printing can be perplexing. Don't worry! In this article, we will explore the possible causes behind this problem and provide effective troubleshooting steps to resolve the issue and get your HP printer back to producing crisp, black prints.
-
Check the Ink Cartridge: Begin by inspecting the black ink cartridge in your HP printer. Ensure it is properly installed and securely seated in its designated slot. Take out the cartridge and examine it for any visible signs of damage or leakage. If necessary, replace the cartridge with a new one from a reliable source.
-
Clean the Printhead: A clogged printhead is a common culprit behind the failure to print black ink. To address this, access your printer's software utility on the computer and navigate to the maintenance or printer settings. Look for the option to clean the printhead or perform a printhead cleaning cycle. Follow the instructions provided and allow the printer to carry out the cleaning process. Once complete, perform a test print to check if the black ink is now flowing correctly.
-
Run a Print Quality Diagnostic: HP printers often come with built-in tools to diagnose and resolve print quality issues. Open the printer's software utility on your computer and look for the print quality diagnostic or troubleshooting options. Initiate the diagnostic process and follow the on-screen instructions. The printer will print a test page with various patterns and colors, allowing you to identify any specific issues related to the black ink.
-
Adjust Print Settings: Review your print settings to ensure they are not inadvertently set to exclude black ink. Open the print dialogue box on your computer and navigate to the preferences or properties section. Check that the color options are configured to include black. Also, verify that the grayscale or black-only mode is not selected. Adjust these settings if necessary.
-
Update Printer Firmware and Drivers: Outdated printer firmware or drivers can lead to compatibility issues that may affect the printer's performance. Visit the HP support website and download the latest firmware and driver updates specific to your printer model. Install the updates according to the provided instructions and restart your computer before attempting to print again.
-
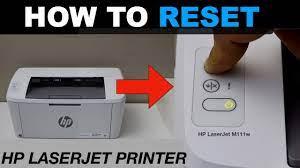
Perform a Hard Reset: If the previous steps have not resolved the issue, a hard reset might do the trick. Turn off your HP printer and unplug it from the power source. Wait for a few minutes, then reconnect the power cord and turn on the printer. This process will reset the printer's internal settings and potentially address any underlying problems preventing the black ink from printing.
Conclusion: Facing an hp printer will not print black color can be frustrating, but with the right troubleshooting steps, you can overcome the issue. Remember to check the ink cartridge, clean the printhead, run a print quality diagnostic, adjust print settings, update printer firmware and drivers, and perform a hard reset if needed. By following these guidelines, you'll be well on your way to restoring your HP printer's ability to produce flawless black prints, ensuring your documents and photos are of the highest quality.