how to reset hp printer to factory settings : Whether you're troubleshooting persistent issues or preparing to sell or donate your HP printer, resetting it to factory settings can provide a clean slate. Restoring your printer to its original factory state can help resolve software glitches and return it to optimal performance. In this comprehensive guide, we'll take you through the step-by-step process of resetting your HP printer to its factory settings.
Step 1: Gather the Essentials Before you begin the reset process, make sure you have all the necessary items. You'll need your HP printer, a stable power source, and a computer or mobile device connected to the same network as the printer.
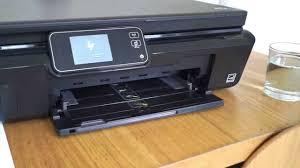
Step 2: Access the Printer's Control Panel Ensure that your HP printer is powered on and idle. Locate the control panel on the front or top of the printer. Depending on your specific model, you may find buttons, a touchscreen, or a combination of both.
Step 3: Navigate to the Restore Factory Settings Option Using the control panel or touchscreen, access the printer's settings or setup menu. Look for an option related to "Restore" or "Reset." It might be listed as "Factory Settings," "Default Settings," or a similar term. Select this option to proceed.
Step 4: Confirm the Reset A confirmation prompt will appear on the control panel or touchscreen, informing you that resetting the printer will erase all customized settings and return it to its original factory state. Take a moment to review the message and ensure you understand the consequences. If you're ready to proceed, confirm the reset by selecting "Yes," "OK," or a similar option.
Step 5: Wait for the Reset The reset process will begin, and the printer will restart. During this time, it's crucial not to interrupt the process or turn off the printer. Depending on your printer model, the reset process may take a few minutes. Remain patient and allow the printer to complete the reset.
Step 6: Reconfigure the Printer Once the reset is complete, your HP printer will restart and return to its factory default settings. Follow the printer's on-screen prompts to set up basic configurations such as language preferences, date, and time. Additionally, you may need to reconnect the printer to your Wi-Fi network if applicable.
Step 7: Test the Printer After reconfiguring the printer, it's essential to test its functionality. Print a test page or send a print command from your computer or mobile device to verify that the printer is working correctly. If the printer responds and produces the desired output, congratulations! You have successfully reset your HP printer to its factory settings.
Conclusion: By following this step-by-step guide, you have successfully hp printer reset to its factory settings. This process can help resolve software issues and restore your printer to its original state. Remember to back up any important settings or configurations before performing the reset. Enjoy the renewed performance and reliability of your HP printer as it continues to assist you with all your printing needs.