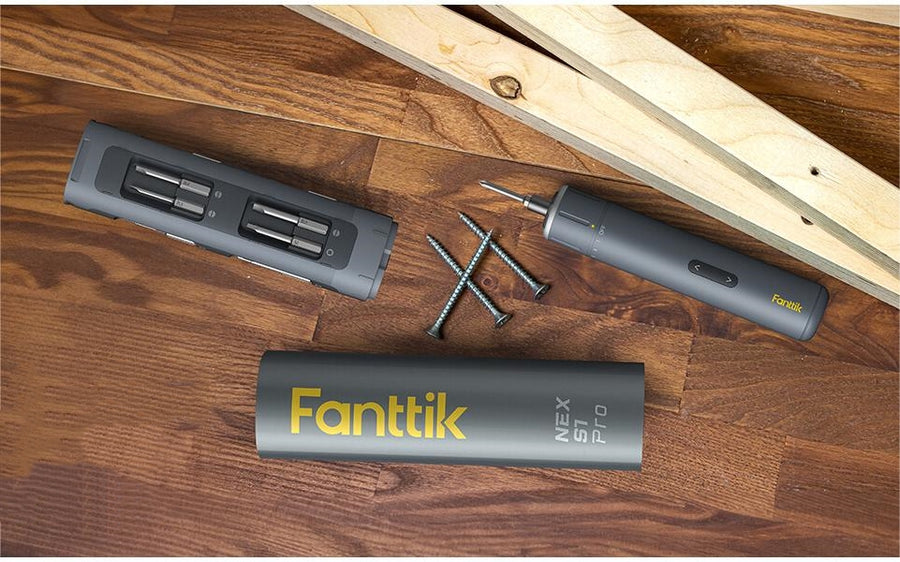
Obviously, one of the interesting things is electric screwdriver unboxing and setup.
Unboxing the latest electric screwdriver: A comprehensive review is an exciting endeavor for any DIY enthusiast or professional. In this article, we will delve into the world of electric screwdrivers, exploring their features, benefits, and how to set them up for optimal performance.
Understanding Electric Screwdrivers
Electric screwdrivers have revolutionized the way we approach various tasks, from assembling furniture to repairing electronics. These power tools are designed to make our lives easier by automating the process of screwing and unscrewing. With their compact size and ergonomic design, electric screwdrivers provide convenience and efficiency.
When unboxing the latest electric screwdriver, you'll notice a range of features that enhance its functionality. These may include adjustable torque settings, LED lights for improved visibility, and a variety of screwdriver bits to accommodate different screw types. The comprehensive review of the electric screwdriver will help you understand the importance of these features and how they contribute to a seamless user experience.
Setting Up Your Electric Screwdriver
Once you have unboxed your electric screwdriver, it's time to set it up for use. Follow these steps to ensure a smooth setup process:
1. Charging the Battery
Most electric screwdrivers come with rechargeable batteries. Before using your screwdriver, it's essential to charge the battery fully. Connect the charger to a power source and insert the battery into the charging dock. Allow the battery to charge for the recommended duration mentioned in the user manual. Once fully charged, remove the battery from the dock and insert it into the screwdriver.
2. Attaching the Screwdriver Bit
Electric screwdrivers typically come with a variety of screwdriver bits to accommodate different screw types. To attach the appropriate bit, locate the chuck at the front of the screwdriver. Open the chuck by rotating it counterclockwise. Insert the desired bit into the chuck and tighten it by rotating the chuck clockwise. Ensure the bit is securely fastened to prevent any accidents during operation.
3. Adjusting the Torque Settings
One of the key features of electric screwdrivers is the ability to adjust the torque settings. Different tasks require different levels of torque, and having this flexibility allows for precise and controlled screwing. Refer to the user manual to understand how to adjust the torque settings on your specific electric screwdriver. Experiment with different torque levels to find the one that suits your needs.
4. Familiarizing Yourself with the Controls
Before diving into your first project, take some time to familiarize yourself with the controls of your electric screwdriver. Locate the power button and any additional buttons or switches that control the speed or direction of rotation. Understanding these controls will ensure you have full control over the tool during operation.
Conclusion
Unboxing the latest electric screwdriver: A comprehensive review has provided us with valuable insights into the world of electric screwdrivers. We have explored their features, benefits, and learned how to set them up for optimal performance. With the right electric screwdriver in hand, you can tackle various projects with ease and efficiency.
For more information on electric screwdrivers and related topics, check out the following credible sources: